The Human Skull

In my first class for Digital Sculpturing I was taught the parts that make up a human skull and also the differences between a male and female skull such as the differences in the superciliary arches. Learning the correct proportion of the human skull is crucial in creating a realistic skull.


First try with Zbrush
Here on the left and right is a head of a monster that I have tried to create using Zbrush.
To create this I have used brush tools such as standard, move, DamStandard and many more.

The Human Nose

In my second class for Digital Sculpturing I was taught the parts that make up a human nose. I have learned that most nose are not always symmetrical and that some have more Alar fat than others for example.
Attempts creating a nose


Brad Pitt's Nose

A Romans Nose

A Hawk Nose
The Human Mouth

In my third class for Digital Sculpturing I was taught the parts that make up a human mouth. All the way from the bottom of the mouth to the top with all its different features.
Attempts creating a mouth


The Human Ear

In my fourth class for Digital Sculpturing I was taught the parts that make up a human ear.
Attempts creating an Ear


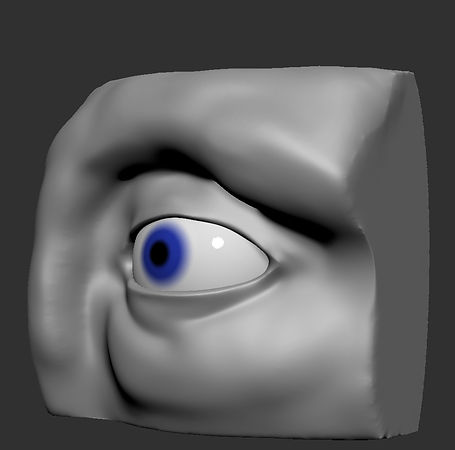
The Human Eye

In my fourth class for Digital Sculpturing I was taught the parts that make up a human eye.
Attempts creating an eye


Villain Idea Development

For my villain that I am going to create I came up with the idea of creating Norse Viking from around the 800s-900s and also show off their culture when creating the Villain with all different tattoos that they get with their Norse mythology and I think that a Viking is a great villain as they are known for in history pillaging English towns and house during their times invading England.


Above I have began to experiment with creating a head template that allows me to add all the details that I will need further down the line.
Facial Fat

Texturing Methods
Method 1


For the first method, I used a the spot paint tool in zBrush in which I chose a base layer first for the head and then I chose lighter pink colours and then painted it over the base texture. I also made the eyes and mouths a darker pink as well as adding some very faint veins to the head.
Method 2


For the second method, I used a premade texture from a website and I imported it into zBrush. To get it onto the model I used the spotlight tool which projects the chosen part of the texture onto the highlighted area.
Villain Development #1


From this week of development on my villain, I have added in the details of the ear as I have researched what a Scandinavian ear looks likes and I have tried to replicate that into my own villain. I have also added in the eyes however I will tweak these again further down the line as i'm not quite happy with how they have turned out in this development process so far but again I have found a Norse viking and have used that as my reference for creating the eyes


Above I have made some minor tweaks from previous development as I have changed around the nose to make it less bold and I have also changed around some parts around the eyes to resemble a more realistic looking eye as previously I have found that the eyes were too wide are too far out of the face so I have made the necessary changes to them. I have also added in details the the villains neck and throat as this is a viking he needed to be very muscular so I have exaggerated the muscles in the neck a lot and have also added detail to the back of the head as well.
Nordic Hairstyles
A Norse viking would always maintain a good warrior styled hair as they never really cut their hair and would just maintain it in a way that makes them look like a good warrior and also so it does not get in their vision. Below are a couple hairstyles that I would like to incorporate into my Villain as well as some facial hair down the line of development.


Villain Development #2


Bring Zbrush files into Maya
In this weeks lecture I learnt about how to bring a Zbrush file into Maya by using Zremesher. Below is the final render from Maya.

Expressions using FACS
In this weeks lecture I learnt all about how expressions are all linked to different isolated action units (AUs). Below I have experimented with AU1, AU4 and AU15 to create the facial expression of sadness.
AU1

AU4

AU15
AU1, AU4, AU15 - Sadness


Villain Development #3


Villain Development #4


Finished Villain With Expressions


